
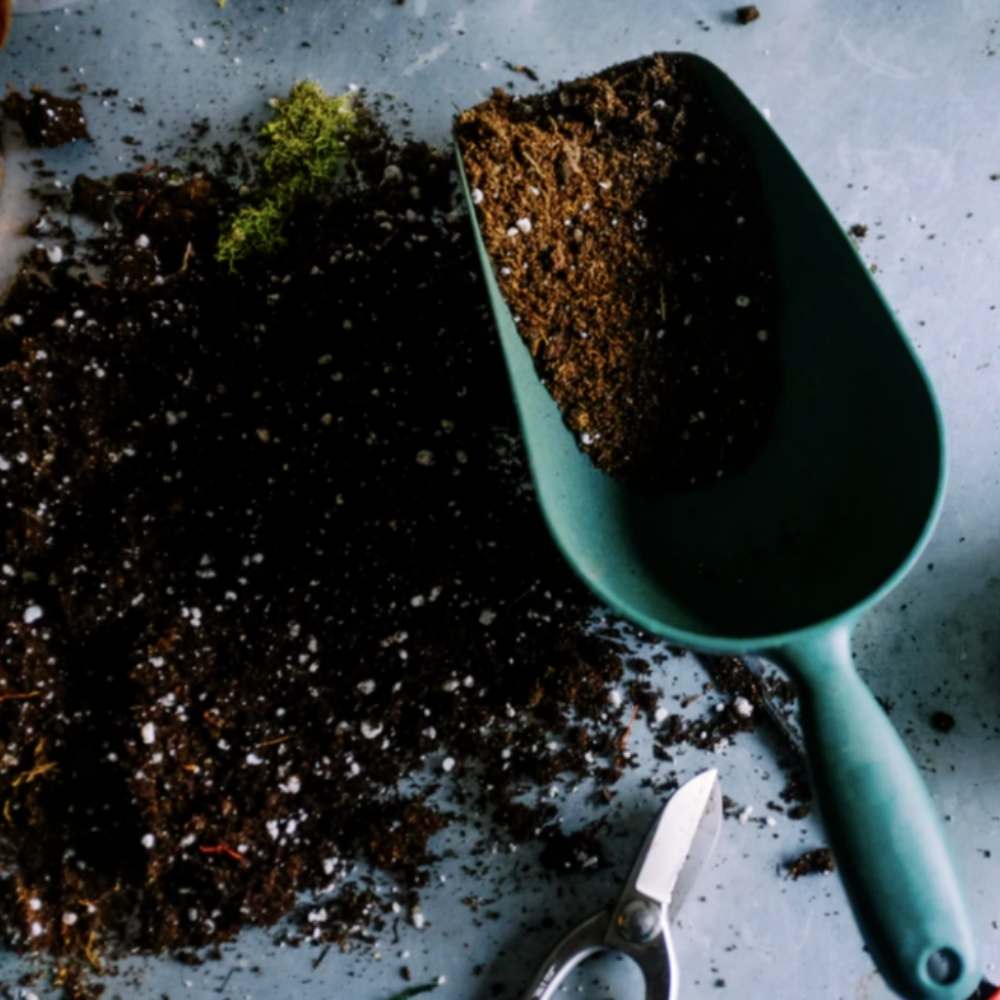
If you’ve never composted before, it can seem daunting. But with a little know-how, you can easily learn how to compost — and turn food scraps into “black gold.”
We’ve compiled this guide to tell you everything you ever wanted to know about compost but were too afraid to ask ;)
This guide includes things like:
- What is compost?
- Benefits of composting
- Key composting terms
- What you can & can't put in your compost bin
- How to compost, indoors & outdoors
And if you have any questions after reading, please don’t be afraid to ask! We’re happy to help.

So, what is compost?
Compost is nutrient-rich soil made from decayed organic matter. Compost is like all-natural fertilizer. It’s become more popular recently, but it’s far from a modern invention. Let’s go back in time together and you’ll see what I mean. .
Composting in the Ancient World
Imagine you’re a farmer in 2300 BCE, living in Mesopotamia between the Tigris and Euphrates Rivers. The days are hot and the rivers flood and give you fertile soil. You farm crops like barley, grapes, and apples.
One day, your neighbor tells you he’s been using food scraps to nourish his fields. You decide to give it a shot, and the next thing you know your grapes are growing like crazy! Amazed, you record this innovation on your trusty clay tablet.
In 2300 BCE, that’s the closest thing you would have had to Instagram. :)
And composting has been around even longer than that, with some archaeological evidence showing the ancient Scots used it as early as 10,000 BCE. So why is composting such a long-lasting tradition?
Benefits Of Composting
When you look at the big picture, it’s easy to see why so many people love compost.
Composting is great for:
1) Your Budget
Soil and fertilizer are expensive, so using compost can save you money when gardening season comes around.
2) Your Garden
Compost is full of the nutrients plants need most. And it improves soil quality, water retention, and aeration. (If you have rocky or clay-heavy soil, this can be a lifesaver)
3) The Planet
Composting reduces waste and keeps food out of the landfill. Food waste in landfills doesn’t break down properly — it actually produces harmful methane gas. Around 14.7% of US emissions come from food in landfills.
It’s also rewarding and can be so fun! There’s nothing quite like running your hands through deep brown, sweet-smelling earth you helped create. Now that we’ve gone over the results, let’s get started on the method.

Introduction to Key Composting Terms
When you’re learning how to compost, you may come across words you don’t recognize. Every hobby has its own lingo, and composting is no exception. So here are the essential composting terms you need to know to feel confident and sound like a pro:
-
Aerate means helping oxygen flow evenly throughout your compost pile. It’s usually done by turning or mixing compost — which keeps the temperature consistent and encourages aerobic bacteria.
- Aerobic Bacteria need oxygen to live. They’re essential in creating good compost. These bacteria make heat, water, and CO2 as byproducts and don’t produce bad smells. Anaerobic Bacteria don’t need oxygen to live. They reproduce quickly if you don’t aerate your compost often enough and can make your pile stinky and slimy.
- Batch composting means having several (often small) batches of compost going at once to make the process more efficient.
- Biodegradable means something can break down into its original elements. All organic matter is naturally biodegradable.
- Browns are materials rich in carbon, like leaves and twigs.
- Carbon is a chemical element often called “the building block of life.” In your compost pile, carbon gives bacteria fuel and helps create healthy soil.
- Carbon/Nitrogen Ratio or C/N Ratio is the balance of carbon-rich to nitrogen-rich materials in your compost (more on this later).
- Cold “Slow” Pile means a large pile of compost outdoors. These piles have a lot more carbon-rich materials in them. They’re low-maintenance but slow, taking six months to two years to break down.
- Compostable means that something will break down into its original elements through composting. Note: Some items marked “compostable” are better for industrial methods.
- Countertop Composting is composting indoors in small batches.
- Decomposition is the process of something breaking down into its original elements.
- Greens are materials rich in nitrogen, like fruit and vegetable scraps.
- Hot “Active” Pile is a compost pile that reaches 110 and 160˚F internally. These piles are full of aerobic bacteria and require frequent turning. But they’re much faster and can create compost in as little as four to six weeks.
- Humus (not like the tasty chickpea dip!) is black or brown soil that comes from decomposed organic materials. Finished compost is a type of humus.
- Industrial Composting Facilities process large amounts of compost and can often take materials that are hard to break down at home.
- Mulch is a soil covering used to protect the ground from weather or prevent weeds. It’s often made from things like wood chips, grass clippings, or hay.
- Nitrogen is an element all living things need. It’s an essential nutrient for plants and helps your compost turn into rich fertilizer.
- NPK stands for “Nitrogen, Phosphorus, Potassium” which are the three macro-nutrients plants need. You may see this term on fertilizers or other gardening products.
- Turn means to aerate your compost by mixing it, usually with a gardening tool.
- Vermicomposting is a type of composting that uses worms to break materials down.
- Water Retention means how well soil can absorb and hold onto water.
- Worm Castings are worm excrement and add nutrients to the soil, improve water retention, and encourage good microbes.
Digging Into the Browns and Greens for Compost
We’re going to teach you how to compost both indoors and outdoors — and either way, you’ll need a healthy dose of browns and greens.
First off, “browns” and “greens” aren’t determined by color. They’re actually based on what elements a specific thing contains.
What are browns in composting?
Browns are organic materials that contain a lot of carbon. They’re like the base of your compost pile and help oxygen flow. Browns encourage aerobic bacteria to do their job — and this keeps your pile from turning into a mess of wet, yucky muck. Some common examples of browns include sticks, dry leaves, newspaper, hair & pet fur, wood chips, or ash. (Only natural ash, not the kind from charcoal.)
What are greens in composting?
Greens are materials rich in nitrogen. Nitrogen is a key component of all plants. It helps them turn sunlight into food, so they can’t grow without it. Greens add moisture and nutrients to your compost. And if you use worms, this is what they eat!
Greens are things like food scraps, grass clippings, flowers, weeds, and coffee grounds.
What’s the right ratio of browns to greens?
Balancing the carbon/nitrogen ratio keeps your compost happy. The best ratio depends on what compost method you’re using.
In general, a good ratio to aim for is 4:1, or 4 parts browns to 1 part greens. You should always start with browns first. If you’re using the “cold slow pile” method, you can use more browns than in other methods.
Don’t stress too much about this. Over time, you’ll get a feel for keeping things in balance. If your pile starts to smell or seems soggy, add more browns. If it’s too dry, add more greens.

TO COMPOST OR NOT TO COMPOST: What You Can Put in Your Compost Pile
When many people think about composting, they assume they can just toss anything in. But some materials can cause big problems if you’re not careful. Here’s a rundown of composting do’s and don’ts.
Great to Compost
- Fruits & vegetable scraps, tops, and ends
- Grains & rice
- Coffee grounds
- Eggshells Teabags (remember to take the staples out)
- Garden clippings
- Twigs, sticks, and leaves
- Ash (from natural sources, not charcoal briquettes)
- Weeds (freshly pulled, not gone to seed)
- Paper towels
- Newspaper Cardboard (brown, unwaxed)
- Sawdust or woodchips
- Grass clippings
- Citrus fruits (don’t use with worm bins — otherwise they’re okay)
Helpful hint: Smaller pieces break down more quickly. So be sure to cut, shred, or break things down before adding them to your compost.
Do Not Add to Compost
- Plastic
- Glass
- Metal
- Coated/waxy cardboard
- Chemical-treated plants or grass
- Weeds gone to seed
- Diseased or bug-infested plants
- Pet food, litter, or droppings
- Foods containing grease, oil, or eggs
Anything that won’t break down or could harm your garden is best left out.
Compost with Caution
- Meat, seafood, or other fish
- Dairy products like milk, yogurt, cheese, or butter
- Bones
- Cooked foods (avoid anything with grease, oil, or eggs)
These items can go rancid & stinky in a hurry, and they attract unwanted pests. We recommend avoiding these — and never use them with worms. If you’re collecting scraps to send to an industrial composting site, check to see what they can process.
Now that you know what you can add to your pile, let’s talk about how to get started composting!
HOW TO COMPOST INDOORS OR OUTDOORS
Outdoor Method #1: Hot Active Bin
This composting method needs attention a few times a week, but it’s much faster than the cold slow pile method.
- Get a large plastic bin with a lid
- Drill holes along the bottom spaced a few inches apart for drainage
- Place your bin wherever your heart desires
- Start with a layer of browns about 4-6 inches deep
- Add a thin layer of soil (optional)
- Add a layer of greens
- Give your bin some time to establish before adding a lot of scraps
- Continue layering greens and browns as needed
- Water occasionally to maintain moisture
- Turn your compost at least a couple of times a week
Your compost will be ready in as little as 4-6 weeks!
Outdoor Method #2: Vermicomposting
Preparing a bin for vermicomposting takes a bit of time. But worms speed up the decomposition process and add extra nutrients to the soil. You can find detailed instructions for a DIY vermicompost bin. Or you can check out our ready-to-use vermicompost Hungry Bin. :)
The Hungry Bin is a continuous flow system that makes vermicomposting super easy.
Once you have your bin & worms, feed them food scraps regularly and enjoy high-quality compost your plants will love.

How to Compost Indoors (Even In an Apartment!)
Even if you don’t have outdoor space, you can still enjoy the benefits of composting. Setting up a countertop compost bin is easy and a great way to reduce waste.
To make your own bin, find a small container with a lid. Drill holes in the lid for ventilation — and add a holder for an activated charcoal pouch, if desired.
Once your bin is ready, simply:
- Line with a plastic or compostable bag (optional)
- Start with a thin layer of shredded newspaper, paper towels, or napkins
- Add fruit & veggie scraps, eggshells, coffee grounds, or other greens
- Never add meat, egg, or dairy products to your countertop compost bin
- Store at room temperature
- Turn occasionally with a long-handled cooking spoon or tongs
- Monitor moisture levels
- Add more shredded paper if it’s too wet
- Add a little water if it’s too dry (but it probably won’t be)
Your compost should be ready in two to five weeks!
How to Tell When Your Compost is Ready
Once the timing is right, you can start checking your compost. Check it by gently scraping away the top layer to see what’s underneath.
You’ll know it’s ready when the compost is dark brown, soft, and uniformly broken down.
Finished compost smells rich and earthy, like damp spring dirt.
Problems to Look Out For
If your compost starts smelling really bad or rancid, toss the whole pile out and start over. You don’t want to risk harming your plants with a bad batch.
You may find more fruit flies hanging around indoors — their eggs are often hidden in fruit peels. You can get rid of them by leaving shallow dishes of apple cider vinegar around your kitchen.
Avoid letting your compost get too hot (especially if using worms, since this could kill them). In very hot or sunny weather, move your bin out of direct sunlight.
Keeping things at the right temperature and balancing greens, browns, and moisture are the keys to composting success. With a little trial and error, you’ll be a pro in no time!
Join the Composting Community

We hope this guide has given you all the tools you need to get started with composting at home. Learning how to compost indoors or outdoors takes a bit of practice, but the results are worth it! From ancient Mesopotamia to modern Manhattan, gardens around the world are richer because of it.
If you have eco-conscious friends, why not invite them to try composting with you? You can learn together — and enjoy happier plants together.
We’d love to hear where you are in your composting journey (let us know in the comments!).
P.S. Once you’re ready to get started, don’t forget to check out our collection of convenient home compost bins.

Jessica
Writer, baker, and lover of nature.